


This is the first post for my new newsletter, everyday thing. The plan is to post a new… article on an article, everyday. A post every day, about a “thing”. These are my rather modest goals for this newsletter. I have roughly 100 “things” queued up to write about, and we will see how long this experiment lasts…
For the most part these “things” have a technical or analytical bent to them. Content is my own, and text and images are made available under a CC-by-SA license. There’s a subscription option, and I’ll be grateful for, but don’t expect subscribers… for the most part, you will be helping to keep this project going. But if I do get any subscribers, there may also be other benefits (extended posts, revisiting items). Subscription rates are set as low as Substack would allow.
I also hope that each post has enough content to keep a technically inclined reader happy for a morning commute.
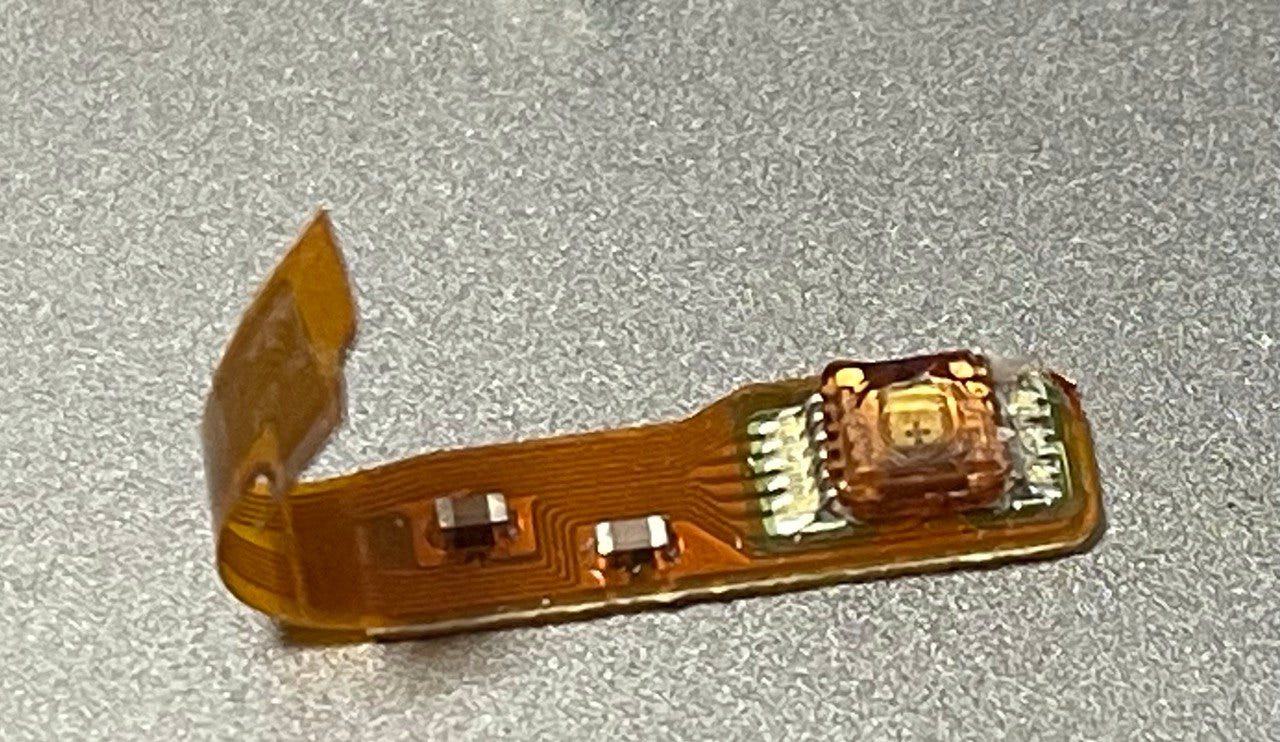
So, on to our first “thing”, the optical sled from a minidisc player:

I’ve chosen to start with this “thing” because I have a number of other minidisc related posts coming, and this will be a useful reference point for future posts.
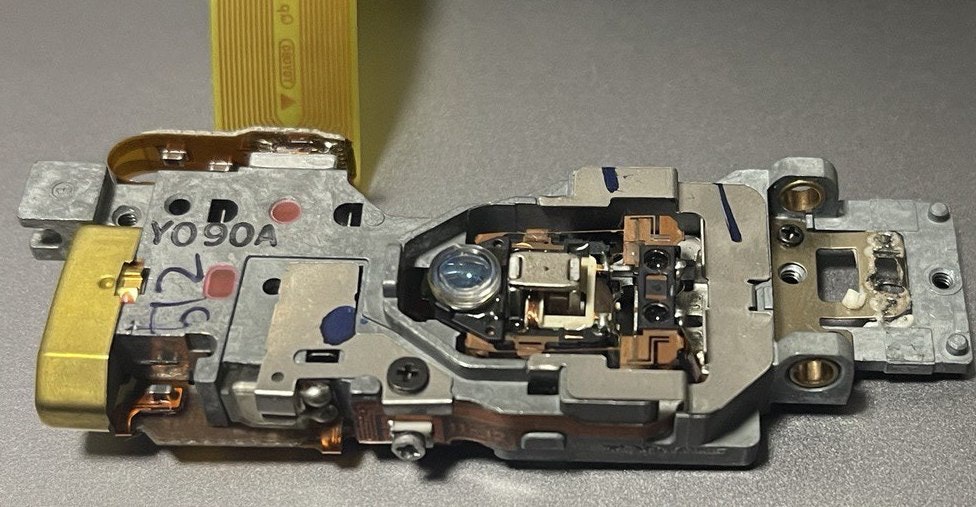
This particular sled is from a Victor MX-S77WMD, a compact HiFi system. While there are lots of great videos on the minidisc ecosystem. There are relatively few on the optical approach used. And it took some searching and fiddling to figure out how this head works.
Minidiscs in many ways feel like an evolution of CD players. And indeed, the laser in this unit looks very much like a Sanyo 780nm CD player laser diode. This is likely the part that failed:

Pre-recorded minidiscs, are more or less, mini-CDs. They encoded data on a pre-mastered disc using almost exactly the same physical format as a CD. Recordable minidiscs however were almost completely different. These are magneto-optical discs, which use the Kerr effect to record data on a disc.
Pre-mastered minidiscs were hugely unpopular, until recently I’ve never even seen one, but even so, all minidisc players had to include the ability to play these two quite different formats.
Magneto-optical drives use a laser to heat up a small spot on the disc beyond its Curie temperature, and then use an electromagnetic to polarize this spot on the disc. Data is read out using the Kerr effect. When a laser is reflected by the magnetically polarized surface, it changes the lights polarization. You can read about this approach in detail elsewhere.
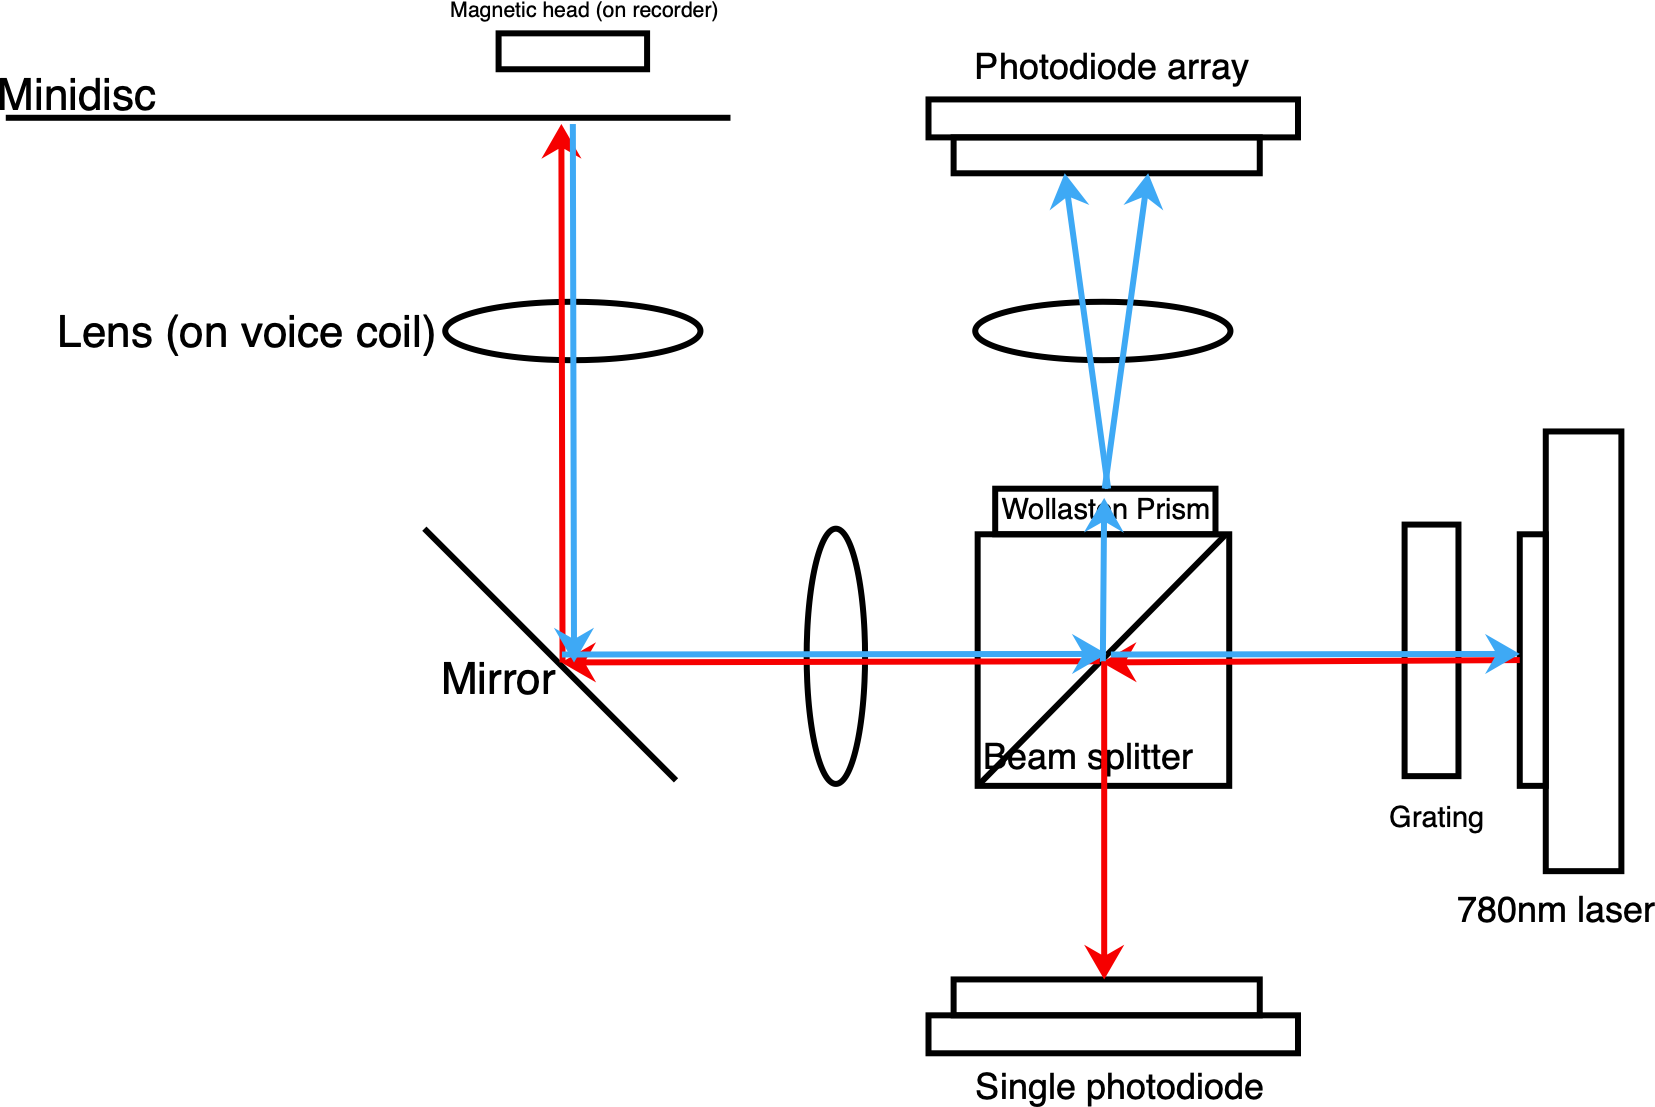
This is all a round-about way of saying, a minidisc player needs a way to determine the polarization of light reflected off the disc in addition to the detecting the pits/lands of a “CD-like” surface. With this in mind, let’s pull apart the head and identify the optical components:
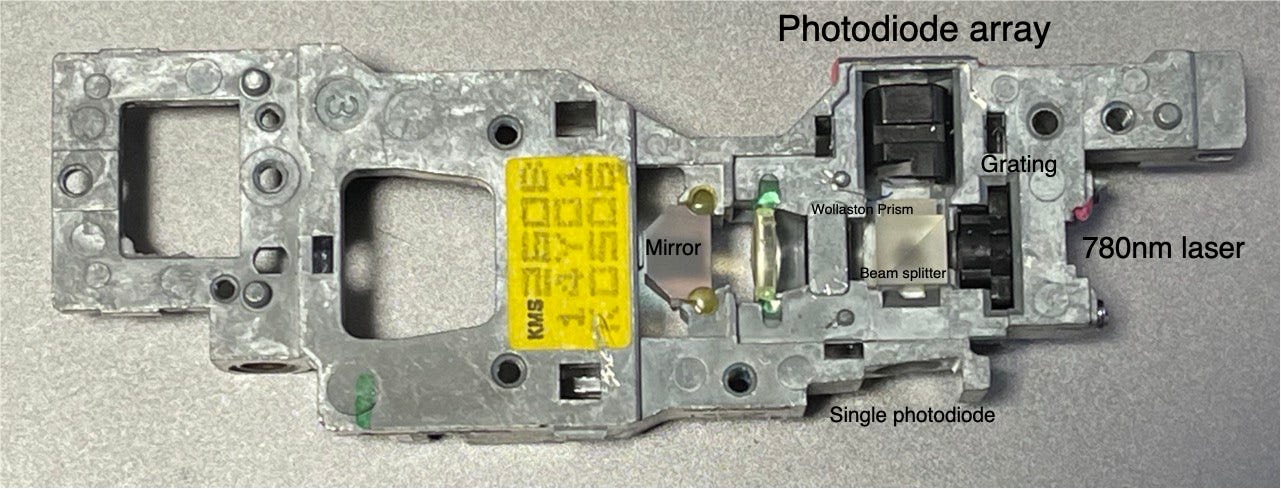
Everything is all pretty much jammed together, but drawing out an optical diagram makes things a little clearer:
There are two interesting optical elements here, the first is the grating. This gives us a main “peak” and two dominant “side” peaks. This is used to keep the laser aligned to pre-printed grooves on the disc. I removed the grating and demonstrate this in the video below:
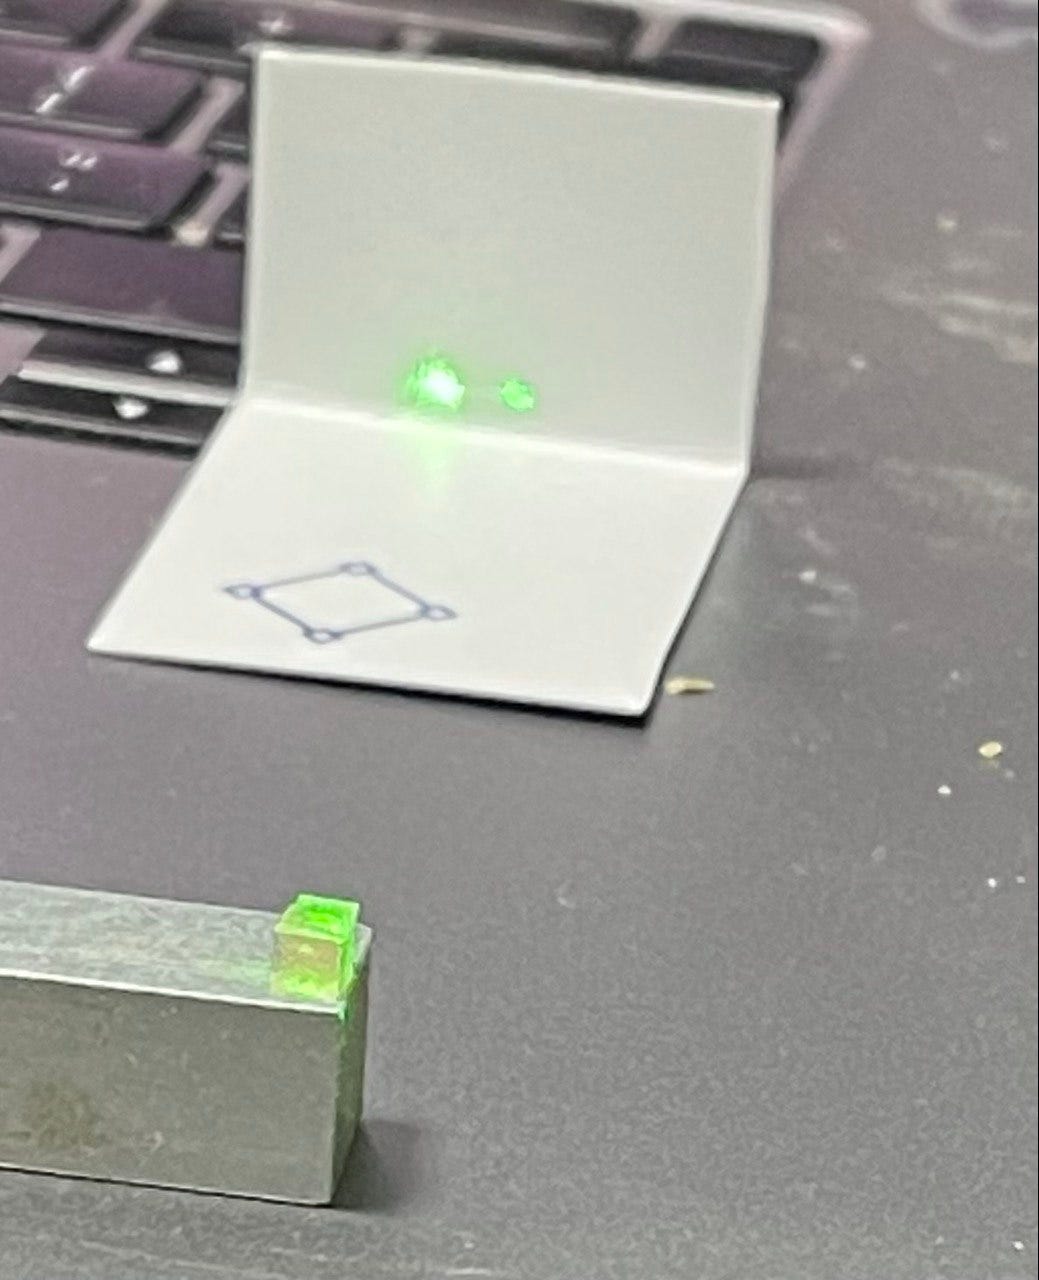
The second is the Wollaston prism this is a tiny element stuck to the side of the regular 50/50 beam splitter. A Wollaston cube is a kind of a polarizing beam splitter laser light goes in and is reflected based on its polarization. I pulled this out too and had a quick play with it:
As shown above, you can see a single laser beam being split into a pair of spots one each for horizontal and vertically polarized components. These then need to be detected, which much like a CD player, uses a small photodiode array:
I stuck this under a (very much hacked together) epi-illuminated microscope and hand stitched the following image together:
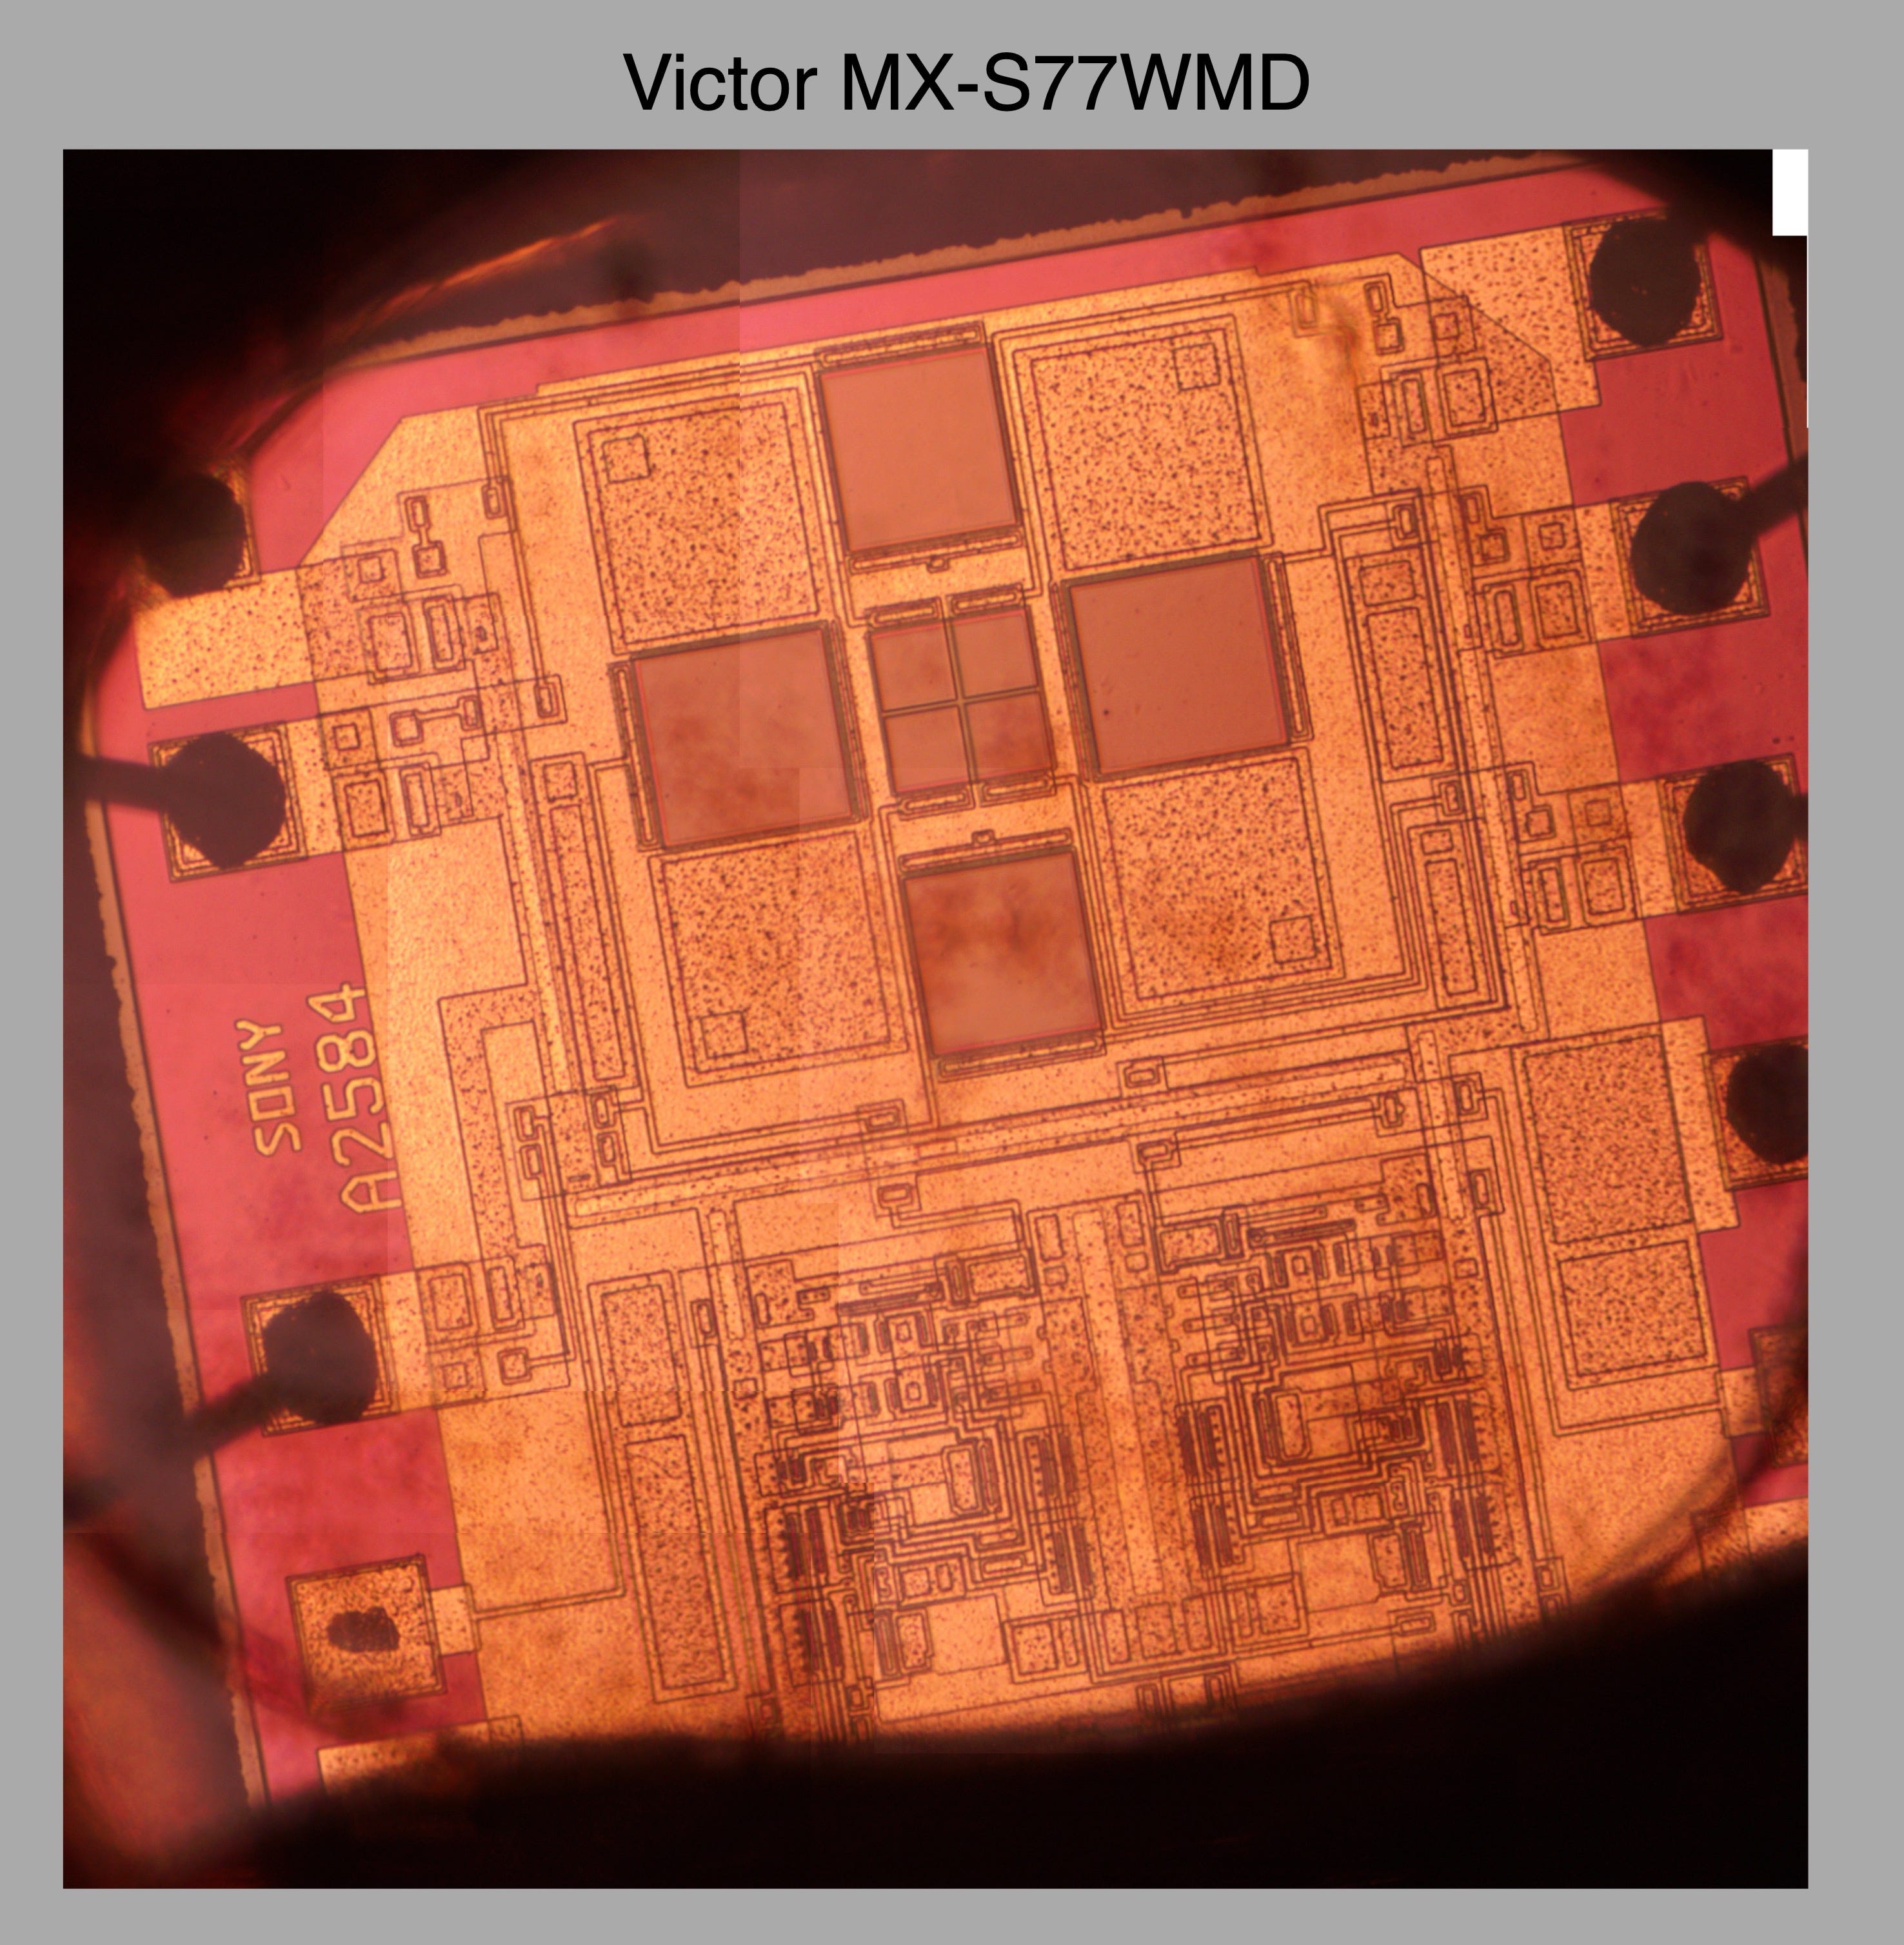
I assume the outer four photodiodes are used to align the diffraction peaks that sit on the alignment grooves. But why you need four of them is l